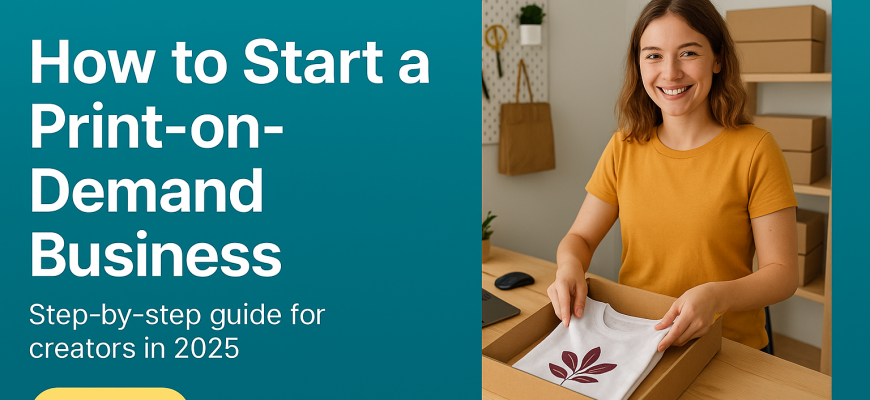
If you’ve been dreaming of starting your own print-on-demand business, you’re in the right place. I’m Alex Rivers, a business coach for women, and I’m here to guide you step-by-step through this exciting journey. Print-on-demand (POD) is an incredible way to launch a product line with low upfront costs and tons of creative freedom. In simple terms, a POD business means you create custom designs for products (like t-shirts, mugs, journals, and more), and a third-party printing partner handles printing each item only after a customer orders – then ships it straight to them. You don’t need to hold any inventory or buy boxes of products upfront. This model has opened the doors for thousands of new entrepreneurs because it drastically lowers the risk and cost of starting an online store. In fact, the global POD market is booming – it’s projected to reach nearly $39 billion by 2030 with annual growth around 25–30%. That means right now is an amazing time to claim your space in this growing industry.
This guide will blend practical how-to steps with a healthy dose of motivation and clarity. By the end, you’ll understand how to go from a spark of an idea to launching your online store – covering everything from choosing the right platform and designing your products to pricing smartly and marketing your brand. And it’s all tailored for a complete beginner. Remember, you don’t need to be a tech whiz or an artist to start – you just need the willingness to learn and the courage to take action. Let’s dive in and turn your vision into a thriving print-on-demand business!
- Step 1: Define Your Niche and Brand Vision
- Step 2: Create Your Designs (Even If You’re Not a Designer)
- Step 3: Choose the Right Platform for Your Store
- Step 4: Select a Print-On-Demand Partner (Print Provider)
- Step 5: Set Up Your Online Store and Integrate Your POD Service
- Step 6: Price Your Products for Profit (Calculating Costs and Margin)
- Step 7: Launch and Market Your POD Business
- You’ve Got This – Time to Press “Print” on Your Success!
Step 1: Define Your Niche and Brand Vision
Every successful business starts with choosing a niche and a clear idea of who you want to serve. In print-on-demand, a niche is basically the specific theme, audience, or product category you’ll focus on. Defining a niche helps you stand out in a sea of generic T-shirts and mugs. So, ask yourself: Who do I want to create for? Maybe you’re passionate about fitness and want to design inspirational gym tanks for women, or perhaps you love pet humor and plan to sell funny dog-themed coffee mugs. Choosing something you genuinely care about or have interest in will make the process more fun and authentic. It’s often better to start with a focused niche (for example, “yoga-themed apparel for moms” or “geeky science stickers”) than to try to appeal to everyone at once. A well-defined niche will guide your design style, marketing voice, and even which products to offer.
Take a moment to brainstorm and research ideas. Look for gaps or underserved communities that you can serve with your designs. Here are a few ways to zero in on a niche or product idea that excites you:
-
Follow Your Passions: Start with topics or communities you’re passionate about – whether it’s travel, mental health, feminism, cats, sports, or anything in between. If it matters to you, chances are there’s a market of like-minded people who’d love products in that area.
-
Research What’s Trending: Browse marketplaces like Etsy or Amazon Handmade to see what types of designs are selling well. You can search for “best-selling print-on-demand products” or see which niches are trending (for example, eco-friendly products, astrology-themed merch, motivational quote tees, etc.). This can spark ideas, but remember you’ll want to add your own unique twist.
-
Identify a Problem or Need: Sometimes great niches come from solving a problem. Is there a community that struggles to find products that represent them? For instance, maybe female coders want more fun tech T-shirts, or nurses want mugs with inside jokes from hospital life. If you can fill a need or represent a group authentically, you’ve got a strong niche.
-
Define Your Brand Personality: As you hone in on a niche, think about the vibe of your brand. Are you aiming for something witty and fun? Earthy and handmade? Bold and activist? Defining your brand’s personality and values now will help keep your designs and messaging consistent. Don’t worry about logos or taglines just yet – just picture how you want people to feel when they see your products.
Once you have a niche idea, write it down along with a short mission statement for your business. For example: “I create stylish, empowering office decor for women entrepreneurs” or “I make quirky pet-themed apparel that makes cat lovers smile.” This will be your North Star as we move through the next steps. Remember, you can always refine or change your niche as you learn what works – the key is to start with something rather than getting stuck trying to perfect the idea. Progress over perfection!
Step 2: Create Your Designs (Even If You’re Not a Designer)
Now for the fun part – designing your products. In a print-on-demand business, your designs are everything. They’re what make a plain shirt or mug into something people must have. But don’t panic if you’re not an artist or graphic designer. These days, you have plenty of tools and resources to create beautiful designs without a fancy art degree. The key is to start creating and keep it simple.
First, consider what types of products fit your niche and ideas. Popular POD products include T-shirts, hoodies, tote bags, coffee mugs, phone cases, posters, notebooks, pillows – the list goes on. You might begin with just a couple of product types (say, t-shirts and mugs) that make sense for your niche. Next, brainstorm design ideas for those products. For example, if your niche is motivational fitness apparel, maybe you’ll create shirts with inspiring quotes or cool typography. If you’re targeting pet owners, maybe you have cute illustrated dogs with funny sayings.
Here are some beginner-friendly ways to bring your design ideas to life:
-
Use Canva or Other Online Design Tools: Canva is a fantastic (and free!) online design platform for non-designers. It has tons of templates and drag-and-drop functionality. You can create t-shirt graphics, mug designs, social media graphics – everything – with an intuitive interface. Just set your canvas size (for example, 4500 x 5400 pixels for a T-shirt graphic, which many POD providers recommend) and start designing. Canva provides free stock elements, icons, shapes, and fonts you can play with. For instance, you can pick a stylish font and type out a catchy phrase for a t-shirt, add a little graphic or embellishment, and voila! – you have a design. They even have pre-made templates for t-shirt layouts you can customize.
-
Start Simple – Text Designs Are OK: You don’t need elaborate artwork. Text-based designs (like quotes or slogans in cool fonts) sell really well and are easy to create. Think of a phrase your audience would love to wear or use. For example, a shirt that says “Mompreneur Mode: ON” or a coffee mug that says “Boss Lady”. Pair it with an attractive font and good layout, and it can look pro-level. Play with font combinations (e.g., cursive script mixed with bold print) and colors. Simple black or white text on a contrasting shirt can be incredibly stylish.
-
Incorporate Free Graphics or Hire Help: If you want graphics (like illustrations or icons) beyond text, you have options. Canva has a library of free and paid graphic elements. There are also sites like Unsplash or Pixabay for free images, and Creative Fabrica or Freepik for vectors and clipart (just always check license terms to be sure you can use them on products for sale). Another approach: invest a little to hire a freelance designer for a custom logo or illustration (websites like Fiverr or Upwork have designers who can create a design for you, often reasonably priced). But to start, you can absolutely do it yourself with basic tools.
-
Keep Your Audience in Mind: When designing, always circle back to your target audience and niche. What style appeals to them? Bold and bright colors, or minimalist and subtle? Would an inside joke or meme from that community make them laugh? Make sure your design message is clear and readable (especially for text) – do a quick test by shrinking it on your screen to see if it’s still legible at a glance. And don’t overcrowd the design; often, less is more.
-
Test and Get Feedback: Once you create a few design ideas, get some feedback if you can. Show a friend or share in a small business community for opinions. (There are many entrepreneur groups online, including women-led business groups, where people exchange feedback.) Just be careful not to let criticism discourage you. Use it to improve. Sometimes a tiny tweak – like a different font color or wording – can take a design from “okay” to “awesome.” But also trust your gut; if you love it and it feels right for your niche, that enthusiasm will shine through.
Don’t let the perfect be the enemy of the good here. Your first designs do not need to be masterpieces. In fact, you’ll likely improve as you go. Many successful POD entrepreneurs cringe at their early designs, but those initial products were what got their business off the ground. So dive in, make a few rough drafts, and refine. You can always add more designs later or even update your listings with improved versions. For now, create a small initial collection – maybe 5 to 10 solid designs across your products – so you have enough to open your store. Most importantly, enjoy the creative process! This is where your personality and vision get to shine. Each design is a chance to connect with your future customers, so have fun with it.
Step 3: Choose the Right Platform for Your Store
With your niche defined and some designs in hand, it’s time to decide where you’re going to sell your products. Choosing the right platform is a crucial step, and as a beginner you have a few great options. The two most popular routes are: selling on an online marketplace or creating your own online store (often using an e-commerce platform). Let’s break down the common choices:
-
Etsy – A Creative Marketplace: Etsy is a well-known marketplace for handmade and custom goods, which makes it friendly for print-on-demand sellers (yes, POD counts as “custom” since products are made to order). For a beginner, Etsy can be attractive because it has a large built-in audience. People go to Etsy to find unique, personalized items, and your products could be discovered there even if you’re new. It’s relatively easy to set up an Etsy shop with no web design skills. Plus, there’s no monthly fee – Etsy charges small listing fees (around $0.20 per listing) and takes a percentage of each sale as a transaction fee. Pros: Immediate exposure to shoppers, simple setup. Cons: Competition is high (there are many other sellers), and you have less control over branding (all Etsy shops have a similar format). Also, Etsy’s fees can add up (transaction fee, payment processing fee, etc.), so factor that in.
-
Shopify – Build Your Own Store: Shopify is one of the most popular platforms for creating an independent online store. With Shopify, you’ll have your own website and brand – for example, yourstore.com. You get a lot of control over the look and feel using their templates, and you can install apps (like print-on-demand service integrations, email sign-ups, etc.) to power up your site. The big advantage is professionalism and control: customers see your store as its own brand, not just a page on a marketplace. Shopify does have a monthly fee (usually starting around $29/month for the basic plan), but it’s very user-friendly and designed for entrepreneurs. Pros: Full branding control, tons of features, scalable as you grow. Cons: You have to drive your own traffic (no built-in shopper base like Etsy), and it has a learning curve to set up the website (though no coding is required, just time to learn the dashboard).
-
Other Platforms: There are other options too. WooCommerce (with WordPress) is a powerful and free e-commerce plugin if you’re tech-savvy or already have a WordPress site – but it might be a bit complex for an absolute beginner and you’d need your own web hosting. BigCommerce, Wix, or Squarespace are additional site builders that can handle POD integrations, each with their own pricing and features. There’s also Amazon (Merch by Amazon) for t-shirt printing – it’s a marketplace like Etsy, but you have to apply for an invite and it’s limited to certain products (often just apparel). And social media storefronts are emerging too (like Facebook Shops or Instagram Shop) which usually tie into one of the above platforms.
To choose the right platform, think about your priorities and comfort level. If you’re not very techy and love the idea of tapping into an existing audience, Etsy could be a great start. If you’re keen on building a distinct brand and don’t mind putting effort into marketing to get traffic, Shopify (or a similar own-store platform) might be better long-term. You can also do both – many sellers start on Etsy to build momentum and later expand to their own website once they have a following. Keep in mind the costs: Etsy’s per-sale fees versus Shopify’s monthly fee and payment fees will likely come out roughly similar when you start making consistent sales, so it’s more about where you want to invest your time.
Action step: go ahead and create an account on the platform you choose. It doesn’t commit you to launch immediately, but securing your shop name is a good idea. For example, if you pick Etsy, you’ll register your Etsy shop (try to choose a name that reflects your brand and niche – you can change it later if needed, but better to pick a good one now). If it’s Shopify, you’ll start a free trial and set up your store name (which will be your temporary domain, like yourstore.myshopify.com until you add a custom domain). Don’t worry about making the site pretty just yet – we’ll get to setting up the store in a bit. For now, the goal is to have your selling platform ready and familiarize yourself with its basic interface.
Step 4: Select a Print-On-Demand Partner (Print Provider)
One of the best parts of the POD model is that you don’t have to print or ship a thing yourself – a print-on-demand partner does that for you. Now it’s time to choose which POD service or supplier will handle your products. There are a handful of major print-on-demand companies out there, and the good news is most of them integrate smoothly with the platforms we talked about (Shopify, Etsy, etc.). The key is finding the one that fits your needs in terms of product selection, cost, and reliability.
Two of the most popular POD providers for beginners are Printful and Printify, so let’s start with those:
-
Printful: Printful is often praised for its quality and range. They offer a wide variety of products – from the usual apparel (shirts, hoodies) and mugs to jewelry, leggings, even bean bags and wall art. Printful integrates with almost every platform (Shopify, Etsy, WooCommerce, Wix, etc.), making it very versatile. They don’t charge a monthly fee; you only pay when an order comes in (the base cost of product + printing + shipping). Printful’s product base costs can be a bit higher than some competitors, but many sellers find their print quality and branding options (like custom labels, packaging inserts for a fee) very professional. Their shipping tends to be quick for major markets since they have fulfillment centers worldwide. Why choose Printful: if you value top-notch quality, lots of product options, and great mockup generators for your product images.
-
Printify: Printify works a little differently – it’s a platform that connects you to a network of print providers (suppliers) around the world. When you create a product on Printify, you can choose which print provider (e.g., a specific print shop in the USA or Europe) will fulfill it. This means Printify often has competitive pricing (you can pick a cheaper provider for a given product if cost is a priority) and sometimes more variety because each provider might offer different products. It integrates well with Shopify, Etsy, and others too. Printify has a free plan and a premium plan (premium costs a monthly fee but gives you a discount on product base costs – useful if you start doing higher volume). Why choose Printify: if you want the flexibility to hunt for lower base prices or unique products from different suppliers. Just remember, quality and shipping times can vary slightly depending on which provider you pick; you may want to order samples from a couple of their suppliers to compare.
-
Other POD Services: There are plenty of others – Gooten, TeeLaunch, Gelato, Redbubble, Zazzle, CustomCat, and more. Some (like Redbubble or Zazzle) are actually their own marketplaces too, where you upload designs and they handle everything (but then you’re selling on their site, not yours). For your own store integration, Gooten and Gelato are solid alternatives similar to Printful/Printify. Gelato, for example, has a large network of printers globally (useful for international sellers), and Gooten offers some product options Printful might not. If you’re using Etsy, also look at Printful and Printify’s Etsy integrations which are very straightforward.
To make a decision, consider the following factors:
-
Product Catalog: Does the provider offer the main products you want to sell? (For example, not all POD companies have jewelry or all have pet bowls – check the catalog.)
-
Pricing and Profit Margins: Compare base prices between Printful, Printify, etc. A T-shirt might cost $8 with one provider and $12 with another – which affects your profit. But balance cost with quality; a super cheap provider isn’t good if print quality is poor.
-
Shipping Locations: Where are your customers? If you expect many in the US, a provider with US facilities is great for quick shipping; similarly for Europe, etc. Printful has multiple fulfillment centers; Printify’s providers list where they ship from. Faster shipping and reasonable shipping rates make customers happier.
-
Integration & Ease of Use: If you’re not very technical, choose a provider known for a seamless integration with your platform. Printful is known for a very smooth experience (you basically push a button to add products to Shopify/Etsy). Printify is also user-friendly but a tad more steps when choosing providers. Most have good tutorials to walk you through connecting to your store.
-
Quality and Reviews: It’s a smart idea to order a sample or two from whichever provider you lean towards before you start selling to customers. This way you can see the print quality, how true the colors are, how the product feels, and how the packaging looks when it arrives. Personal testing gives you confidence in what you’re selling. Also, read some recent reviews or community discussions (there are many POD seller forums) to get a sense of people’s experiences.
The great thing is, you aren’t locked in forever – you can switch or use multiple POD providers in one store if needed. But to keep it simple, start with one. Action step: sign up for a free account with the POD provider of your choice (you can sign up to a couple and poke around their product catalogs, mockup generators, etc., before deciding). Popular choice for many beginners is to use Printful for its ease, or Printify if looking for lower cost options. Once you have an account, we’ll move on to setting up your actual store and connecting everything together.
Step 5: Set Up Your Online Store and Integrate Your POD Service
It’s store-building time! Don’t worry – this is easier than it sounds, and you do not need to be a tech guru to get a basic, professional-looking store online. The process will differ slightly depending on the platform you chose (Etsy vs. Shopify, for example), but the general idea is the same: you need to add your products (with those awesome designs) to your store, set up things like pricing and descriptions, and ensure that your print-on-demand partner is correctly linked so orders flow through automatically.
Let’s break down the setup into steps. Use this as a checklist and take it one item at a time:
-
Set Up the Basics of Your Store: If you’re on Etsy, you will fill out your shop information (shop name, bio, profile picture, maybe a banner image) and go through their quick setup flow which includes adding at least one product to officially “open” the shop. If you’re on Shopify (or another platform), you’ll pick a store theme (a template for design – Shopify has many free themes to choose from) and enter basic details like your store name, maybe a logo if you have one, and make sure your payment setup is done (so you can accept credit cards, etc. – Shopify uses Shopify Payments or you can enable PayPal, while Etsy will handle payments via Etsy Payments automatically).
-
Connect Your POD Provider to Your Store: This is a crucial part. Most POD services have an integration app or built-in connection. For Shopify, you typically go to the Shopify App Store and install the app for Printful or Printify (whichever you chose). For Etsy, you often connect via the POD provider’s dashboard – for example, in Printful you can add an Etsy store and it will walk you through granting it access to your Etsy account. Once connected, this integration means that when you create products in the POD app and push them to your store, they will appear in your online shop listings. It also means when a customer buys something, that order will automatically go to Printful/Printify to fulfill. Follow the instructions from your chosen provider – they usually have very user-friendly guides for connecting to each platform (it’s a one-time setup and usually just involves logging in and giving permissions).
-
Add Your Products and Designs: Now the exciting part – making your listings live. Through your POD provider’s app or dashboard, create a product listing for each design you want to sell. This usually involves selecting the product type (say, “Unisex T-Shirt”), then uploading your design file to place it on the product. You’ll get to position it, choose colors of the shirt available, etc. The app will generate mockup images – those are the pictures of the product with your design on it – which you’ll use in your store listing. You’ll also set the title, description, and price for the product (more on pricing in the next step, but you might input a tentative price now). Write a clear, appealing product description for each item, highlighting things like the material or size info if needed (“100% cotton tee, soft and comfy”) and the design inspiration (“Featuring the empowering phrase ‘Hustle and Heart’ to keep you motivated at the gym!”). Tip: use keywords in your titles and descriptions that your ideal customer might search for, such as “funny dog coffee mug” or “feminist quote shirt”. This helps with search visibility on Etsy or even Google.
-
Organize Your Products in the Store: If your platform allows, organize your items so it’s easy for shoppers to browse. Etsy might use sections, Shopify has collections. You could group by product type (e.g., Apparel, Accessories, Home Décor) or by theme if you prefer. In the beginning, with only a few products, this isn’t critical, but it’s good practice for later when you have more items.
-
Set Up Store Policies and Essentials: As you prepare to launch, make sure you fill out vital info like your shipping settings, return policy, and about page. With POD, shipping is usually handled by the provider but you need to set the shipping rates in your store. Some POD apps can sync shipping costs, or you might use flat rate shipping. For example, many sellers build shipping cost into the product price and offer “free shipping,” as customers love that – you’d then just absorb the fulfillment’s shipping charge. Alternatively, you can charge a separate shipping fee that covers what the provider will charge you. Check what your provider’s shipping rates are (Printful, for instance, might charge around $3–4 for a t-shirt shipment in the US; they have charts on their site). Ensure your customers will be charged appropriately at checkout. Also, write a brief refund/return policy – generally, with custom POD products, you might only accept returns if there’s a defect, since you can’t resell returned custom items. And write an “About” blurb sharing your story or passion – this is especially nice on Etsy to connect with customers (why you started this shop, what your mission is).
-
Double-Check Everything: Before you announce your store to the world, do a thorough once-over. Are all your product images looking good? (No typos in the design, images are clear and not cut off.) Do the links work? Is your pricing right? If possible, do a test order: many POD services let you order samples at cost – try ordering one of your own products as if you were a customer, to see the process and check that the order correctly appears in your Printful/Printify dashboard. This also gives you a firsthand look at shipping speed and product quality when it arrives.
Setting up the store can feel like a lot of moving parts, but take it step by step. Most platforms and POD apps provide prompts or checklists as you go along. And remember, you can always edit your listings or settings later. For now, you just want a functional store that people can visit, see your products, and make a purchase without issues. It doesn’t need to be fancy at launch – even a clean, simple shop is fine. You will learn and improve the look over time. Action step: Finish adding your initial products and get your store to a point where you’d feel comfortable with someone placing an order. Congratulations – that means you’re basically ready to launch your POD business!
Step 6: Price Your Products for Profit (Calculating Costs and Margin)
One of the trickiest parts for new entrepreneurs is pricing. How do you decide what to charge for your t-shirts or mugs? Price too high and you might scare off customers; price too low and you might not cover your costs (or be taken seriously). With print-on-demand, pricing is especially important because each item’s base cost (what the POD provider charges you) is relatively high compared to buying in bulk. But don’t worry – you can make a healthy profit if you price strategically. Let’s break it down.
First, understand your costs per item:
-
Base product + printing cost: This is what your POD partner charges you for making the item. For example, Printful might charge around $12 for printing a basic t-shirt with your design (varies by shirt brand/quality), and maybe $8 for a mug. Printify’s cost might be lower or higher depending on provider. You’ll find these prices in their product catalogs.
-
Shipping cost: Your customer will (usually) pay for shipping at checkout, but whether you charge separately or include it in price, ultimately the shipping fee is passed on to the POD provider to ship the item. E.g., if shipping for a shirt is $4, either you add $4 separately, or you priced the shirt $4 higher to offer “free shipping.” Remember to account for this either way, since it affects total a customer is willing to pay.
-
Marketplace fees: If you’re selling on Etsy, they take a cut (currently Etsy’s transaction fee is about 6.5% of the price + shipping, plus payment processing ~3% and the 20¢ listing fee). If on Shopify, you pay payment processing fees (around 2.9% + 30¢ per transaction via Shopify Payments). These percentages mean if you sell a $20 item, a small portion goes to the platform. It’s not huge, but it’s a factor.
-
Other costs: Don’t forget any subscription costs like Shopify’s monthly fee (spread that over your sales) or marketing costs (if you plan to run ads, etc., that’s an expense to recoup).
Now, decide on a profit margin – basically, how much above your total cost do you charge. Many POD entrepreneurs aim for around a 20% to 50% profit margin on their products. For example, if all-in cost (product + printing + shipping + fees) for a t-shirt comes to $15, you might price the shirt at around $20–$25. That would give you $5–$10 profit per sale, which is roughly a 30-50% margin. A good rule of thumb is somewhere around 20–40% margin to start – enough to be worth your time but still in a price range customers find reasonable.
When setting your prices, consider these points:
-
Research the Market: Look at other similar products in your niche. If most custom mugs on Etsy are selling for $15–20, that’s a clue to where customers are comfortable. You don’t want to be drastically above that (unless your product has extra value) or too far below (undervaluing your work). For your own website, you have more flexibility, but you still should be in line with general market expectations.
-
Psychological Pricing: Little pricing tricks can influence buying. Many sellers use prices like $24.99 instead of $25, because it just feels a bit cheaper to customers. It’s not mandatory, but something to consider. Also consider offering free shipping by baking in a few dollars to your product price – customers often prefer “free shipping” at $25 over “$20 + $5 shipping,” even though it’s the same total.
-
Don’t Undersell Yourself: It might be tempting to price super low to get sales, but remember you deserve to be paid for your creativity and effort. Also, if your prices are too low, customers might assume your product quality is low. It’s better to compete on uniqueness and quality than price alone. If you truly believe your $25 t-shirt brings someone joy and is good quality, stick to that price and focus on finding the customers who see the value.
-
Volume and Discounts: In the future, you can play with your pricing strategy – for example, maybe you give a 10% off coupon for buying 2 items, or set a slightly lower margin on an item to make it a “hook” product that attracts people to your store. When starting, you might keep it simple: one price for each type of item. You can always adjust as you learn what sells and how customers respond.
-
Cover Your Costs: Always do the math for each product: Price – (base cost + shipping + fees) = profit. Make sure that profit per item feels worth it to you. Even if it’s $5 profit on a mug, if you can sell a bunch, it adds up. But if something is only giving $1 profit, you probably need to raise price or reconsider because unexpected costs could eat that quickly.
Finally, remember that pricing is not set in stone. You can tweak prices if you find you’re not getting sales (maybe customers find it too high) or if you’re getting sales too easily (which could mean you’re leaving money on the table). When you’re just launching, it’s okay to price slightly lower to attract early customers or get those first few sales rolling in. You can raise prices later once you have some momentum or reviews. Also, as you grow, you might find ways to improve your margins (like moving to a premium plan on Printify for cheaper base costs, or getting bulk discounts if you ever hold inventory of a bestseller). But for now, pick reasonable prices that cover costs and give you motivation to keep going.
Action step: Set the prices for all your products in your store admin or POD app (wherever pricing is configured). Double-check how it appears to customers, and that you’ll still make a profit after fees. It might feel real when you see, “Wow, I’m charging $25 for a t-shirt I pay $12 for.” That’s normal in retail (keystone markup). Own it confidently – you’re providing a custom, made-to-order product with your original design, and that’s worth every penny.
Step 7: Launch and Market Your POD Business
You’ve done the groundwork – now it’s time to open your doors to the world and start making some sales! Launching your print-on-demand store is as simple as hitting that “publish” or “go live” button, but getting your first customers will require some proactive marketing. Don’t let that word intimidate you: marketing is just about letting people know about the awesome products you offer. Let’s go through some beginner-friendly marketing basics to get the ball rolling.
1. Announce Your Launch: Start with your immediate circle and existing channels. Share the news on your personal social media – Facebook, Instagram, Twitter, LinkedIn, wherever you’re active. Don’t be shy; friends and family might be your first supporters. You can say something like, “I’m excited to announce the launch of my new online store! I’ve created [niche] themed products – check it out [link]. Your support or feedback means the world to me!” This personal touch often garners positive responses. Even if they don’t buy, they might share your post or cheer you on, which builds confidence and word-of-mouth. If you have an email list (or just a list of contacts who’d be interested), send a friendly announcement email as well. Celebrate this milestone – it’s a big deal!
2. Leverage Social Media for Your Business: Beyond your personal announcement, set up dedicated social media pages for your brand if you haven’t already. For example, an Instagram account and a Facebook page for your store can be very useful. Start posting content related to your products and niche. This could be photos of your product mockups, lifestyle images (e.g., your shirt design Photoshopped onto a model or a flatlay – Printful and other services often provide nice mockup images you can use), behind-the-scenes of you working on designs, or inspiration that resonates with your audience. Consistency is key: try to post regularly, maybe a few times a week at first. Use relevant hashtags (for instance, #printondemand, #GraphicTee, or niche-specific tags like #DogMom if you sell pet stuff). Engage with communities – comment on other posts in your niche, join Facebook groups where your target customers hang out (not to spam, but to participate and share when appropriate). Over time, this builds awareness. You don’t have to be on every platform – choose one or two where your audience is likely to be. For visual products, Instagram and Pinterest can be great. If your niche leans towards professionals or entrepreneurs, maybe LinkedIn posts could even work. And don’t overlook TikTok – many small business owners find success making short videos packing orders or showcasing designs; viewers love the authenticity. Pick whatever you’re comfortable with and go from there.
3. Optimize Your Listings for Search (SEO): If you’re on Etsy, this is crucial: use strong keywords in your product titles and tags so people searching can find you. Think like a customer – if you sell a coffee mug with a cat joke, the title could be “Funny Cat Lover Coffee Mug – Cute Kitten Illustration Gift for Cat Mom”. That packs in keywords someone might search for (“cat lover mug”, “gift for cat mom”). On your own website, ensure your product descriptions and titles likewise include natural keywords; this will help with Google searches over time. SEO (Search Engine Optimization) can be a deep topic, but basic idea is to clearly describe your product in terms people commonly use. It may take time to be indexed and appear in search results, but it’s free traffic when it happens.
4. Consider Promotions or Coupons: A little incentive can help convert a curious visitor into a buyer. You might offer a launch promo like “Use code LAUNCH10 for 10% off your first order” and advertise that in your social posts or website banner. People love feeling like they got a deal. Just make sure your pricing accounts for it (10% off shouldn’t put you at a loss – it usually won’t). On Etsy, you can create a sale or coupon in the settings; on Shopify, there’s a discounts section to generate codes. This not only encourages sales, it also gives a friendly nudge for those on the fence.
5. Tap Into Your Niche Community: Go where your potential customers are and engage. For instance, if your niche is fitness moms, maybe there are popular Facebook groups or forums for fit moms – join and contribute genuinely (follow group rules; some allow promotional posts on certain days). If your niche is anime fans, maybe participate in anime subreddits or local clubs. Because you share their interest, it’s natural to talk about it. Over time you can mention “I made a design about this, check out my shop” when appropriate. Also consider reaching out to influencers or bloggers in that space: maybe there’s a yoga instructor with an Instagram following who might love your “Namaste” tank top – you could offer to send her one for free in hopes she might share it (this is a type of influencer marketing). Even small influencers can have dedicated followers, so a shoutout or a wearing of your product can bring a nice bump in traffic.
6. Use Content Marketing (if it fits): This is optional, but if you enjoy writing or creating content, it can help attract customers. For example, start a simple blog on your website about topics related to your niche (“Top 10 Inspirational Quotes for Women Entrepreneurs” if that’s your niche, mentioning your products in it) or make helpful pins on Pinterest linking to your products. Content like how-tos, tips, or entertaining posts can draw people in who then notice your products. This is a longer-term strategy and not required on day one, but something to keep in mind as you grow.
7. Paid Advertising (small steps): If you have a bit of budget and want to accelerate, you could experiment with ads. For Etsy, Etsy’s internal “Promoted Listings” or Etsy Ads can boost your product visibility in search for a few dollars a day. On Facebook/Instagram, you can run a targeted ad (for example, show your product to women aged 25-45 who like “small business” or whatever aligns). Start tiny (even $5 or $10) just to see how it works; ads need careful tweaking and can eat money fast, so don’t feel like you must do this. Many POD sellers actually find success without any paid ads, purely through social media and SEO. But it’s an option down the line.
8. Provide Great Customer Service: This might not sound like marketing, but it absolutely is – happy customers become repeat customers and give you good reviews, which in turn attract more customers. So when you get that first order (hooray!), make sure to follow through. Even though the POD company ships the item, you should still double-check everything is processed correctly. Communicate with your customer: thank them with a quick email or note, let them know an estimated delivery if possible, and be ready to answer any questions. If any issue arises (like a delay or a misprint), be proactive and professional – contact your POD provider to fix it and keep the customer updated. A reputation for caring about your customers will set you apart. Especially as a woman-owned small business, leaning into that personal touch is something big corporations can’t replicate.
Finally, be patient and persistent. Very few businesses explode with sales in the first week. It might take time – weeks or months – for your marketing efforts to bear fruit and for people to find your store. That’s normal! Don’t get discouraged. Keep promoting a little each day, keep adding or refining designs over time, and treat every small win as proof that you’re growing. The beginning is often the hardest; once you have your first 10 or 20 sales and some reviews, momentum tends to build.
As you market your business, remember to circle back to the earlier steps as needed. Maybe an online trend inspires you to create a new design, or feedback tells you to adjust a price – you’re constantly learning and iterating. That’s the beauty of this journey. Action step: Make a simple marketing plan for your first month. For example: “Week 1, announce on personal socials and launch coupon. Week 2, post on my business Instagram three times and join one Facebook group. Week 3, reach out to that blogger I follow to see if she’d like a free sample. Week 4, run a small Etsy ad test.” Adjust to what fits your life. You don’t have to do all these things at once; even a consistent effort in a few areas will make a difference.
You’ve Got This – Time to Press “Print” on Your Success!
Starting a print-on-demand business as a woman entrepreneur is an empowering adventure. You’ve walked through the journey from that first inkling of an idea – picking a niche and designing products – to the nitty-gritty of setting up an online store, choosing partners, and marketing your brand. Now, it’s go time. Will it be challenging? At times, absolutely – like any new venture, you’ll face obstacles, learning curves, maybe a sprinkle of self-doubt. But here’s what I want you to remember: every expert was once a beginner, and every successful online store started with just a few designs and a first sale. You’ve done the homework by reading this guide, and you’re already far more prepared than many who jump in without a plan.
Keep in mind that you’re not alone on this journey. There’s a growing sisterhood of women entrepreneurs in e-commerce, all breaking barriers and crushing goals. In fact, over 12 million businesses in the U.S. are women-owned, contributing around $2.7 trillion in revenue – and those numbers keep rising. You are in great company, and you absolutely have what it takes to succeed. Whenever that little voice of doubt creeps in, remember that other women have built businesses from scratch and thrived; if they can do it, so can you. The print-on-demand field might have lots of players, but none of them have your unique perspective, your designs, your story. That is your superpower.
As you set out to launch and grow your POD business, embrace the mindset of progress over perfection. It’s okay if your initial logo is a bit simple or if you only have 5 products to start – you are taking action, which is more than most ever do. You will learn and adapt as you go; that’s all part of the entrepreneurial adventure. Celebrate every little win: your first design completed, your shop going live, your first sale, your first review from a happy customer. Each one is a milestone on the road to a thriving business.
Most importantly, stay persistent and passionate. There may be days when you feel overwhelmed (e.g. a design doesn’t print right, or a week of slow sales dampens your spirits). In those moments, reconnect with why you started. Maybe it’s to earn extra income for your family, or to share your creativity with the world, or to prove to yourself that you can build something of your own. That “why” will fuel you to keep pushing forward. And don’t hesitate to build a support network – whether it’s a fellow female entrepreneur you met in a Facebook group, a friend who can be your cheerleader, or even a mentor/coach – we all lift each other up. Sometimes just talking through an issue with someone who “gets it” will recharge your motivation.
I believe in you, and I’m genuinely excited for the journey ahead of you. You’ve got the creativity, the knowledge, and the drive. Now, take a deep breath, pat yourself on the back for coming this far, and launch that store with confidence. Your dream print-on-demand business is just around the corner, waiting for you to bring it to life. You’ve got this – it’s time to press “Print” on your success!